|
Creating a Guitar Animation in Photoshop
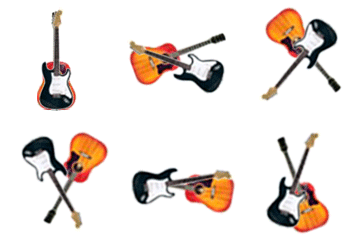
These animations were created using Photoshop CS2 but could also have been made in similar fashion using a combination of Photoshop for the layered PSD file creation, followed by using Image Ready to build the animation. The steps I followed were: 1. Locate two suitably sharp guitar images from the internet. Both were JPEGs with a white background, so the first step was to open each in Photoshop, float the image layer, then mask and cut out the white background to a transparency. In the above animations, the background mask was created rather hastily, resulting in the white fringe around the guitar bodies, hence these GIFs are best used on a white background. The colored cells illustrate the problem. There was also some stray image data left behind that creates the blotches of white at the top right of the guitar neck. 2. Next, the layer containing one guitar image was dragged onto the other image and the resulting two layers positioned and resized to align the guitars atop one another. A layer set was then defined which contained the two guitar layers. 3. 3 actions were created for some simple tasks, one for a +10° rotation of the image and another for a -10° rotation. The third action was to duplicate the layer group (layer set). I planned on a series of 36 rotations for a full circle movement of each guitar, so 36 layer sets would be built. 4. Start the layer build up: a. Duplicate
the active layer set 5. Hide all layer sets except the initial one with both guitars at 12-o'clock; define this image as the first animation frame in the PS CS2 animation palette or export the image to Image Ready (PS CS or earlier) and do the same. 6. Create next frame, hide currently active layer set and unhide the next consecutive set. 7. Repeat step 6 until 36 frames have been created, with each associated to one particular layer set. 8. Select all frames and set the desired frame interval 9. Want a common background added? Add a new layer as desired and make it visible through all frames. 10. Save For Web (PS CS2) or Save Optimized (Image Ready) to save the animated GIF. 11. Save the PSD file for future use. Here is another example animation created using a similar approach. A ZIP file (622KB) containing both the PSD file used for the creation of this animation and the GIF animation file itself may be downloaded by clicking on the image. At first glance of the animation below, you might think the red circle is spinning. Upon closer examination you realize it is only an illusion casued by the apparent movement of the inset circle filled with white or green. Creation of this animation is summarized in a short 5-minute video which can be viewed by clicking on the animation. As I continued to play around with animations....and keeping in mind I tend to learn "on the fly" more than by reading the manual or tutorials...I learned that my approach to building an animation is unnecessarily complicated by having too many layers. That is, I have always created a separate layer for each "stage" of movement, opacity change, or other layer modification that I would then associated with a particular animation frame. For example, in the prior animation of the spinning circle, you saw that I had a layer for each position of the rotated inset circle. Each layer was in turn hidden or made visible for a frame of the animation. What I have since learned is that each frame of an animation works much like a snapshot of the current working state of an image. So, rather than create multiple layers to achieve movement for example, you simply create an animation frame and show those layers which you want visible in the frame. Then, you generate a new frame from the current one, modify all visible layers or hide them as desired, then repeat the process. So, that rotating inset circle could simply have been a single layer that was rotated through the range of positions needed, rather than one layer for each position. With this idea in mind, I created the final animation below, and again the PSD and GIF files have be provided in a ZIP file that may be saved by clicking on the image. |
||||||


